
Products
Contact Us
Get A Quote
Recommend


‹
›
‹


›
Product Description
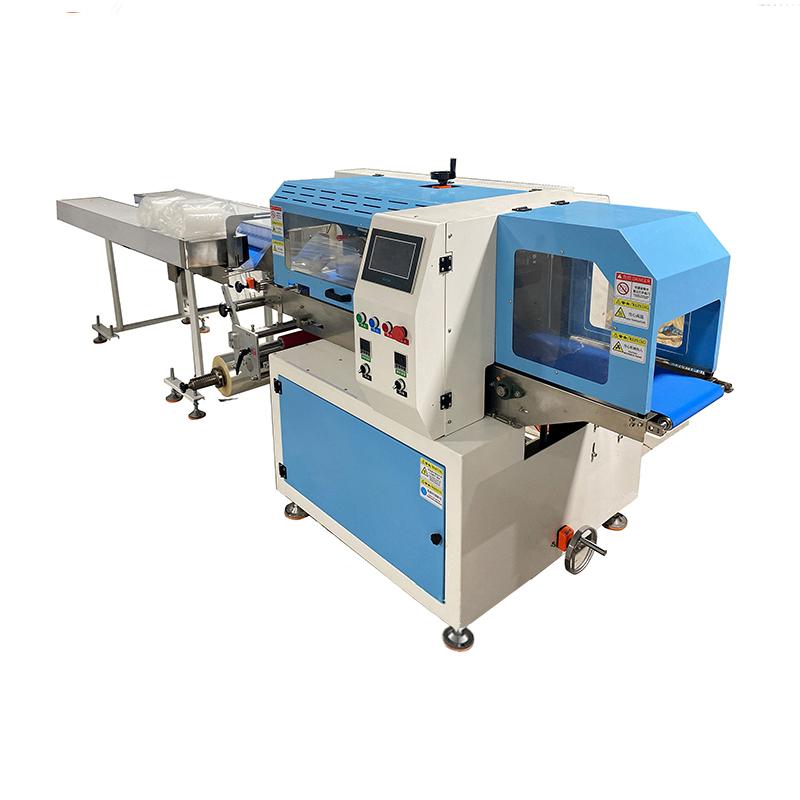
Features
l Top and bottom cutting structure, popular for high height products.
l Three servo motor version, high speed output, stable operation, saving time and film.
l Interface feactures easy and quick setting and operation.
l Self failure diagnosis, clear failure display.
l High sensitivity photoelectric eye color tracing, numerical input of cutting sealing position for extra accuracy.
l Temperature independent PID control, more suitable for packaging different materials.
l Positioned stop function, without sticking knife or wasting film.
l Simple driving system, reliable working, and convenient maintenance.
l All control is realized through software, easy for function adjusting and technical upgraded.
Suggested packaging material:
Antifog film( also other composite membrane)
Suggested film thickness: 25-80μm
Packing sample photos:

Technical Specification:
Output
Up to 30 m/min film speed(calculate different bag length)
Product and film characteristic may affect machine output
Bag Size Range
Package cut-off length
As long as u want
Product width
150-280 mm
Product height
max.200 mm
Packaging Material Reel
Reel diameter
≤300mm
Core diameter
≤75mm
Packaging material width
90-600 mm
Weight
max. 25 KG
Connections
Voltage
110V/220V/380V,50HZ/60HZ
Power usage
2.8 KW
Machine weight
About 550kg
Machine dimensions
L4030*W1070*H1330 mm
Blade cut type
Top and Bottom cutting structure
Motor configuration
Three servo motor
Optional Device
date printer, gusset device, perforating machine, nitrogen flush, and etc.


Message
Products Recommended
 600X vegetable packing machine
 520 ten-head combination weighing and packaging machine
 Bag-feeding powder packaging machine
 200/250/300 Automatic Premade Pouch Bagging Packaging Machine
 M2 facial mask tray folding and cartoning machine
 180 Large non-standard cartoning machine
 130 Automatic Cartoning Machine
 120F glue spraying box sealing machine
 120 Intermittent Automatic Cartoning Machine
 720 powder packaging machine
- 520 powder packaging machine


Chat Online